Your hygrometer is most useful when it answers a clear question about the air where you live. Put it somewhere repeatable in the occupied part of the room, then give the sensor time to settle according to its instructions before you compare readings.
That sounds less exciting than finding the perfect height, but a consistent location is what makes a small display useful. A number collected beside a shower, another beside a cold window, and another beside the sofa describe different local conditions rather than a clean trend.
Choose the question before the shelf
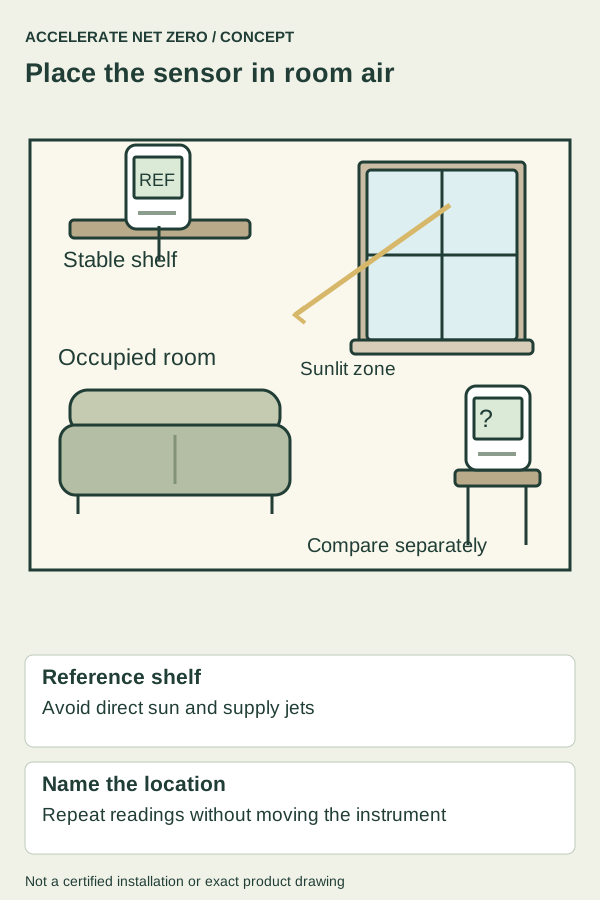
If you want to understand how your bedroom feels overnight, choose a normal bedroom location where air can circulate around the instrument. If you want to investigate a damp window corner, use that corner as a separate investigation point and keep your regular room location as a reference.
Write those two purposes on your log instead of moving one sensor around without recording the change. You can call the locations “bedroom reference” and “window check” so that a later reader understands why their readings might differ.
A whole-house average is a different task again. One instrument on a hallway shelf cannot establish that a closed upstairs bedroom, basement storage area, and downstairs living room have the same conditions, even if the hallway happens to feel comfortable.
Start with the room connected to your actual concern rather than buying enough sensors to cover every corner. You can expand the comparison after the first few days reveal which times or locations deserve a closer look.
Avoid measuring the appliance instead of the room
A supply register can expose the sensor to recently conditioned air, while a humidifier outlet can surround it with a locally wet plume. A reading in either spot may be real for that spot while giving you a poor picture of the air around your chair or bed.
Look around the proposed shelf with the system running and the room in its usual arrangement. Curtains, an open window, a ceiling fan, a sunny sill, a lamp, and the back of a television can all make the placement less representative than it first appears.
Do not hide the instrument in a drawer to make the room look tidier, and do not press its ventilation openings against books or upholstery. The instrument needs exposure to the air you intend to observe, with the clearances and orientation its manufacturer specifies.
You also need to be able to read it without changing the conditions each time. Opening a rarely used cupboard, carrying the display into a brighter room, or holding it in your hand before checking the number adds avoidable variation to your routine.

Use an ordinary occupied location
A side table or open shelf near the part of the room you use is often a practical starting point. Choose a position protected from spills and knocks, especially if children or pets can reach it, without enclosing the sensor or putting it against a heat source.
There is no universal magic height that turns an inexpensive room meter into a building diagnostic instrument. Follow the product instructions first, then describe the location well enough that you can return to it after cleaning or replacing the battery.
You might write “open bookcase, middle shelf, interior wall, opposite the bed” instead of merely “bedroom.” That short description is more useful than an elaborate room map if it keeps everyone in the household from choosing a different shelf each morning.
For a rented home, pick a freestanding location before considering anything that requires drilling or attachment. A stable, accessible instrument is easier to maintain, and you avoid confusing the measurement project with an unnecessary alteration to the building.
Let a moved sensor settle
When you carry an instrument from a cool room into a warmer one, both the device and the surrounding air conditions have changed. Read its instructions for the settling time, and mark a moved reading as provisional rather than immediately treating it as the new room's normal value.
Your hands, a pocket, a bag, or a car ride can also affect the starting conditions. Put the instrument in the chosen location, leave it alone, and return later instead of watching the display while repeatedly moving it to see which number looks right.
If the instructions do not explain response time clearly, keep the first readings after a move out of your main comparison and ask the manufacturer. You are better served by a modest, repeatable record than by claiming that a device has stabilized after a guessed number of minutes.
A logger can help you see what happened during the night, but check its sampling interval and clock before interpreting the graph. A gap in recording, a flat battery, or a sensor placed in the wrong room is a data problem rather than evidence of steady household conditions.
Compare two instruments without declaring a winner
If two meters disagree, place them near each other in the same stable location with space around their sensors. Allow both to settle, then record their temperature, humidity, stated tolerances, and whether either has an adjustable offset or a calibration procedure.
Do not assume the more expensive display is correct, and do not average the readings simply to produce a reassuring number. Two instruments can share an error, and an arithmetic average does not establish a reference standard.
Check whether the manufacturer specifies accuracy across the entire range or only within a narrower interval. A bold accuracy statement on a sales page can be easy to misread if its footnote excludes the cold garage or very humid location you want to monitor.
Use only a manufacturer-supported calibration or checking method. An improvised moisture test can produce a confident-looking correction while adding uncertainty, and you do not need to expose the instrument to water or corrosive materials just to make a normal home log.
Keep temperature beside humidity
Record the temperature along with the relative humidity percentage because the two readings belong together. A room that warms during the afternoon can show a changing percentage even when your household has not added an obvious new moisture source.
Imagine your reference sensor stays on the bookcase, while a second meter sits beside an afternoon window. If the window meter changes more sharply, the first question is whether the placement differs, rather than whether the whole room suddenly developed a moisture problem.
Keep your observation modest: “window-side location differs from the bookcase after lunch” is supportable from those readings. “The wall is leaking” or “the air conditioner is undersized” would require additional evidence that these two displays cannot provide.
A room sensor is a measurement of nearby air, so keep that boundary attached to your interpretation. It does not detect every hidden leak, establish the moisture content inside a wall, or show whether concealed materials are dry.
Make the record easy to continue
Use a small log with the location name, time, temperature, relative humidity, and a short event note. Record changes such as a shower, open windows, cooking, a moved sensor, or a battery replacement when they happen, while keeping the main reading location stable.
For example, you might compare the bedroom reference before breakfast and before bed for several ordinary days. Add a separate note when guests stay or laundry dries indoors, so those unusual conditions do not disappear into a misleading weekly average.
If you see water, staining, or a recurring musty smell, record and address that observation directly rather than waiting for the display to cross a particular threshold. A modest room percentage cannot cancel visible evidence that part of the building is wet.
When you eventually discuss the concern with a qualified professional, bring the location description and a few meaningful readings. Knowing where the numbers came from makes the conversation more useful than presenting dozens of unlabeled screenshots from a sensor that kept moving.
Sources & further reading
- NWS: Discussion on Humidity — Relative humidity depends on temperature; saturation and dew point relationships.
- ThermoPro: TP-50 Model Manual — Legacy model instructions and local reading context; current CORE page not substituted for the inspected Amazon package.
Sources checked October 24, 2026. Product details can change; confirm the exact model and listing before purchase.